While WiFi tethering is the most convenient way to share your Internet connection from your Android phone to your Mac, sometimes you may need to use USB.
But while it’s easy to tether from Android to Windows, tethering between Android and Mac can be more difficult, depending on which Android device you’re using. Here’s how to set up Android USB Tethering on macOS.
In this article, we will show you the 2 easiest and fastest ways to configure Android USB Tethering on macOS.
Use built-in USB Tethering option
If you’re using a modern Android device running Android 12 or higher, USB Tethering support on macOS may already be built in. You don’t need any extra tricks to make this work. For example, on a Pixel 7 running Android 13, you just connect your phone to your computer.
Here’s what you need to do:
- Unlock your phone and connect your phone to your Mac via a USB cable.
- If you are using macOS 13, you may need to tap Allow your phone to connect.
- A message will appear on the phone that the device is being charged via USB. Please click it.
- In the USB Preferences screen that opens, set Use USB for to USB tethering.
You can now start accessing the Internet on your Mac as usual. If you’re connected using a 4G or 5G mobile data connection, monitor usage (if you have a cap).
If the message doesn’t appear when you connect your phone, you can go to Settings > Network & Internet > Hotspot & tethering and enable USB tethering. If your phone is not connected to your computer via a USB cable, this option will be grayed out, keep in mind that some menus may be slightly different depending on the type of phone you are using.
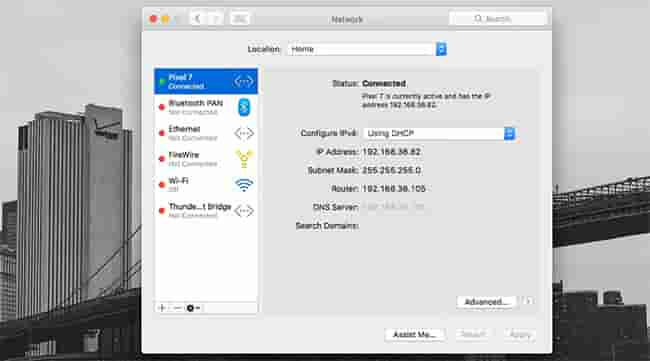
To verify the connection on your Mac, go to System Settings (or System Preferences) > Network, where you’ll see a green dot next to your phone’s name.
If your phone doesn’t support USB tethering on macOS and you can’t set up WiFi tethering, there’s another option. However, this has its own potential difficulties.
Using HoRNDIS driver
Older Android devices, or devices that don’t support USB tethering on the Mac, are missing the drivers required to enable Internet tethering. Fortunately, you can install a third-party HoRNDIS driver to get it working. This is the driver equivalent to the one used on Windows computers and is supported by all Android devices.
HoRNDIS is free and open source and works fine in many cases. However:
- It hasn’t been updated since 2018, so newer versions of macOS may not be supported.
- It doesn’t work on Macs with Apple Silicon.
- Discussions on the software’s Github page include several workarounds to get HoRNDIS running on M1 and M2 machines. But it’s a complicated process that involves disabling the Mac’s System Integrity Protection feature, so it’s not suitable for most users.
Assuming you don’t fall into the above exception, here’s how to set up HoRNDIS on your (Intel-based) Mac.
- Download and install the latest version of HoRNDIS (PKG file) on your Mac.
- You should restart your Mac at this stage, but depending on the version you are using, this may not be necessary.
- Now, follow the steps above. Connect your phone via USB, tap the notification labeled Charge this device via USB, and set Use USB to USB tethering.

Conclusion
You should now be able to connect to the Internet. Go to System Preferences > Network, where you should see a green dot next to your phone. This confirms that the connection is active.
To uninstall HoRNDIS, check the /System/Library/Extensions/ and /Library/Extensions/ directories and delete HoRNDIS.kext. Then restart your Mac.
